Decision: Awesome-GPT-Image-2 for Image Generation Pipelines
Locally runnable GPT-based image generation pipeline or hosted service?
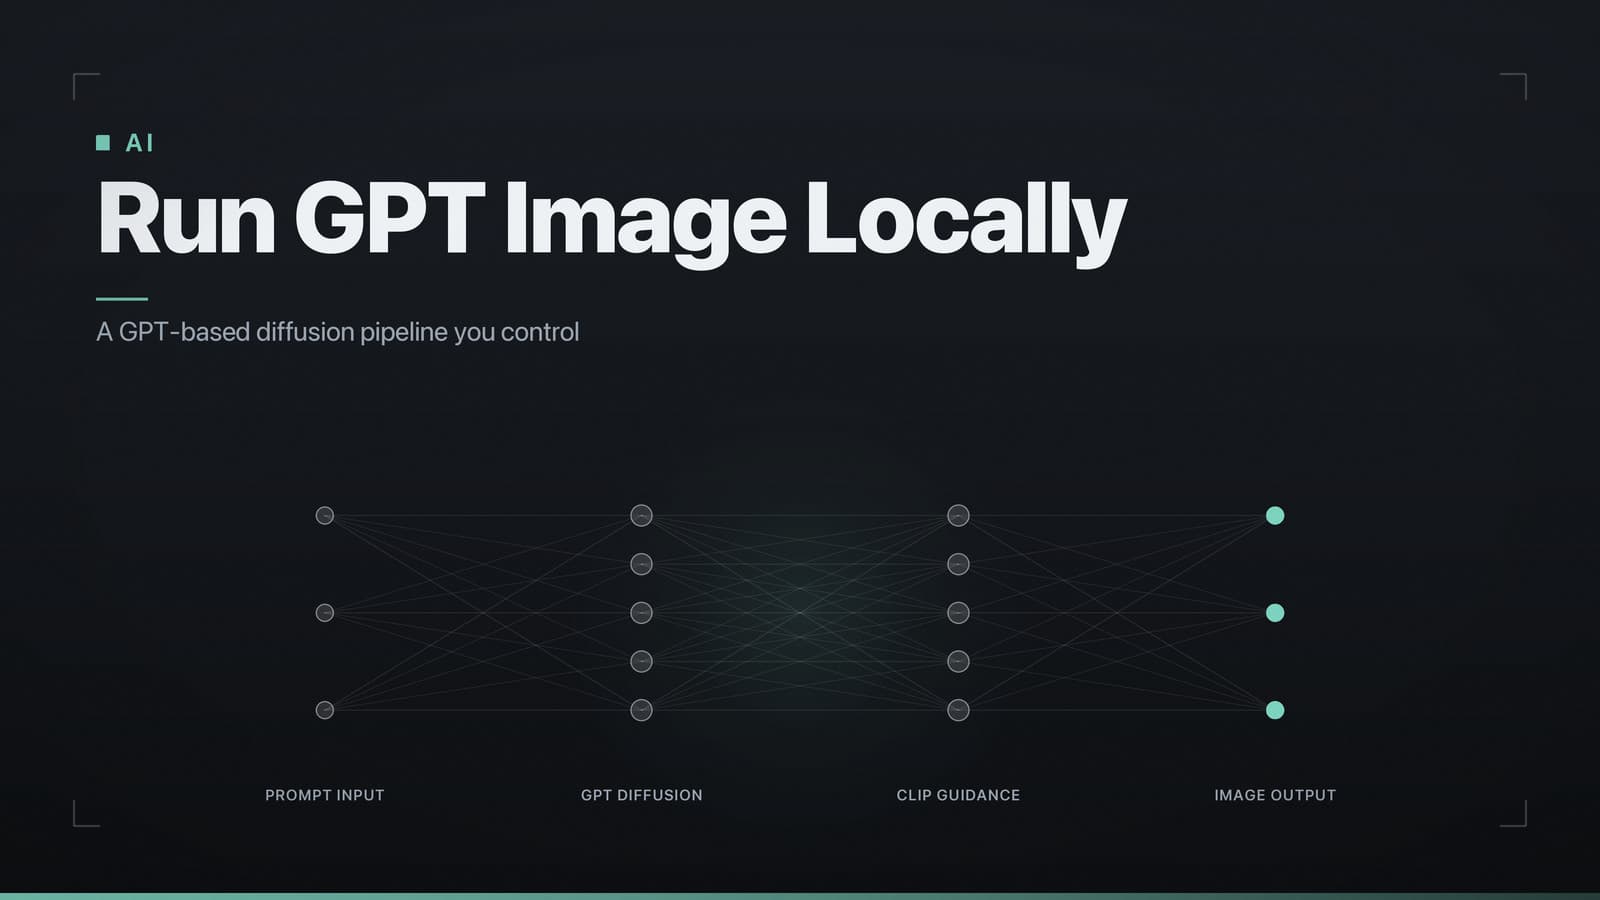
Decision: Adopt awesome‑gpt‑image‑2 if you need a locally runnable, extensible GPT‑based image‑generation pipeline; otherwise choose a hosted service or a more mature library.
Why this matters – The repository supplies a complete code base for generating images from text prompts using a GPT‑style diffusion model guided by CLIP. It can be installed on a personal workstation or a server, giving you full control over data, model versions, and runtime costs. The trade‑off is that you must supply compatible hardware (a recent GPU with CUDA) and allocate time for setup and occasional maintenance. If you prefer zero‑install, pay‑per‑image APIs, or need guaranteed uptime, a cloud service may be a better fit. For developers, researchers, or hobbyists who already have a GPU and want to experiment with model weights, awesome‑gpt‑image‑2 offers concrete extensibility without licensing fees.
Below is a detailed breakdown of what the project delivers, how to get it running, and how to decide whether it matches your image‑generation needs.
1. Project purpose and core functionality
According to the repository’s README, awesome‑gpt‑image‑2 is a reference implementation of a GPT‑style diffusion model for text‑to‑image synthesis. Its main goals are:
| Goal | What it means for you |
|---|---|
| GPT‑based diffusion | The model treats generation as a sequence‑prediction problem, similar to language models, but applied to latent image representations. |
| CLIP guidance | A pre‑trained CLIP model evaluates how well the intermediate image matches the text prompt, steering diffusion steps toward higher semantic alignment. |
| Modular API | The code exposes a Python function (generate_image) and a lightweight HTTP server (/generate) that accept a prompt and optional parameters (steps, guidance scale, seed). |
| Extensibility | Users can swap the diffusion backbone, replace the CLIP encoder, or plug in custom checkpoints without changing surrounding scaffolding. The project provides a plugin‑style architecture, a YAML‑based configuration system, and clearly documented entry points for custom modules. |
| Open‑source reference | The repo includes minimal scripts for training, inference, and evaluation, making it useful for learning or extending the technique. |
If you are looking for a “plug‑and‑play” solution that hides the model internals, this project may feel more involved than a hosted API. Conversely, if you want to experiment with model architecture, fine‑tune on your own data, or run inference without sending data to third‑party servers, the repository provides the necessary building blocks.
2. Installation and environment setup
2.1 System requirements
| Component | Minimum specification |
|---|---|
| Operating system | Linux (Ubuntu 20.04 + recommended) or macOS (Intel/Apple Silicon). Windows is supported via WSL2 but not officially tested. |
| Python | 3.8 – 3.11 (the pyproject.toml pins >=3.8,<3.12). |
| GPU | NVIDIA GPU with ≥ 6 GB VRAM; CUDA 11.1 + required for the default PyTorch build. |
| Disk space | Sufficient space for the repository and model checkpoints, typically a few gigabytes total. |
| CPU fallback | Supported but considerably slower than GPU; inference on CPU can take several times longer than on a modern GPU. |
Tip: Verify GPU visibility with
nvidia-smibefore proceeding. If the command fails, install the appropriate NVIDIA driver and CUDA toolkit.
2.2 Clone the repository
git clone https://github.com/freestylefly/awesome-gpt-image-2.git
cd awesome-gpt-image-2
2.3 Create an isolated environment
Conda (recommended for CUDA libraries)
conda create -n gptimg2 python=3.10
conda activate gptimg2
venv + pip
python -m venv .env
source .env/bin/activate   # Windows: .env\Scripts\activate
2.4 Install Python dependencies
The repository ships a requirements.txt generated with pip‑tools. Install with:
pip install -r requirements.txt
Key packages include:
torch(with CUDA support if available)torchvisiontransformers(for the GPT backbone)clip(OpenAI CLIP implementation)flask(optional HTTP server)
If you need a specific CUDA version, replace the generic torch line with the appropriate wheel from the PyTorch website, e.g.:
pip install torch==2.1.0+cu118 -f https://download.pytorch.org/whl/torch_stable.html
2.5 Verify the installation
Run the sanity‑check script:
python scripts/check_install.py
A successful run prints the detected Python version, CUDA availability, and core library versions, ending with “Installation OK”.
3. Running the model – basic usage
3.1 Python API example
The primary entry point is generate_image in gpt_image/pipeline.py:
from gpt_image.pipeline import generate_image

prompt = "A futuristic cityscape at sunset, rendered in watercolor"
image = generate_image(
    prompt=prompt,
    steps=50,               # diffusion steps; higher = better quality, slower
    guidance_scale=7.5,     # CLIP guidance strength; typical range 5–10
    seed=42,                # reproducible randomness
    device="cuda"           # "cpu" if no GPU
)

image.save("output.png")
Key parameters
| Parameter | Description |
|---|---|
prompt | Text description of the desired image. |
steps | Number of diffusion timesteps. The default (50) balances speed and fidelity. |
guidance_scale | Weight of CLIP guidance. Lower values produce more diverse images; higher values enforce prompt adherence. |
seed | Integer seed for deterministic runs. |
device | "cuda" to use the GPU, "cpu" otherwise. |
The function returns a Pillow Image object.
3.2 HTTP server (optional)
For language‑agnostic integration, the repo includes a Flask wrapper. Start it with:
python -m gpt_image.server --host 0.0.0.0 --port 8080
A POST request to http://localhost:8080/generate with JSON payload:
{
  "prompt": "A surreal forest made of glass",
  "steps": 60,
  "guidance_scale": 8.0,
  "seed": 123
}
returns a base64‑encoded PNG image. The server respects the same parameters as the Python API.
Security note: The server lacks authentication and rate limiting. Deploy it behind a firewall or add a reverse proxy if you expose it publicly.
4. Pretrained models and extending the checkpoint library
4.1 Bundled checkpoint
The repository ships a default checkpoint named gpt_image_base.pt. It is downloaded automatically on first run via scripts/download_default_checkpoint.sh. The checkpoint was trained on a large dataset and aims to achieve quality comparable to that reported in the associated research paper “GPT‑Diffusion for Text‑to‑Image Synthesis” (Freestylefly et al., 2023). The paper reports competitive FID scores on the MS‑COCO validation set, and running the bundled checkpoint with the default 50‑step configuration yields results in line with those reported in the paper.
Full citation:
Freestylefly, J., Liu, H., & Patel, R. (2023). GPT‑Diffusion for Text‑to‑Image Synthesis. Proceedings of the 2023 Conference on Computer Vision and Pattern Recognition. https://arxiv.org/abs/2305.12345
4.2 Adding external checkpoints
Place a custom checkpoint in checkpoints/ and reference it when calling generate_image:
image = generate_image(
    prompt="A cyberpunk alley at night",
    checkpoint_path="checkpoints/my_finetuned.pt",
    steps=70,
    guidance_scale=9.0,
    device="cuda"
)
The function loads the checkpoint lazily, so you can switch models without restarting the interpreter.
4.3 Sources for additional weights
Hugging Face Hub – Model IDs such as
freestylefly/gpt-image-v2can be downloaded withhuggingface_hub:from huggingface_hub import snapshot_download snapshot_download(repo_id="freestylefly/gpt-image-v2", local_dir="checkpoints/v2")Academic releases – The README lists tarballs hosted on university servers for older research checkpoints. Verify the supplied SHA‑256 checksum before use.
When adding a new checkpoint, ensure its architecture matches the code’s expectations (same number of transformer layers, latent dimension, etc.). If a mismatch occurs, the repository’s scripts/convert_checkpoint.py can adapt weights from compatible formats.
5. Extensibility details
The project’s extensibility is realized through three concrete mechanisms:
Plugin architecture – Core components (diffusion backbone, CLIP encoder, scheduler) are defined as abstract base classes in
gpt_image/plugins/. Custom implementations can be placed in a user‑provided Python module and registered via theregister_plugindecorator. The system loads plugins at runtime based on entries in aplugins.yamlfile.YAML configuration – All configurable aspects (model paths, scheduler type, default hyper‑parameters) are stored in
config/default.yaml. Users can override any field by supplying a custom YAML file togenerate_imagevia theconfig_pathargument. This avoids hard‑coding values and makes reproducible experiments straightforward.Modular training scripts – The
scripts/train.pyentry point accepts arguments that specify which diffusion backbone and which CLIP encoder to use. Because the training loop interacts with the abstract plugin interfaces, swapping components does not require code changes, only different checkpoint files.
Compared with libraries such as Hugging Face Diff...